Source Code
Here is a list of repositories containing code for the different projects with VirtualHome.
VirtualHome API: Code to connect and communicate with the simulator. Includes a gym-style API to train RL agents.
VirtualHome Unity: Code for the Unity Simulator.
Program Data Collection: Allows to prepare the interface based on Scratch used to collect activity programs.
Sketch2Program: Code to reproduce the experiments for Synthesizing Environment-Aware Activities via Activity Sketches.
Watch-And-Help: Code to reproduce the experiments for _Watch-And-Help: A challenge for Social Perception and Human-AI collaboration`.
How to create new objects
Written by Juliette Grassent
It is possible to create your own objects, or use objects from the included packages:
Complete Home Interior Pack
Modern House Interior Pack
which are not yet made interactive in virtual-home using ProBuilder.
ProBuilder allows to modify a gameobject, and to separate different faces for example, in order to have 2 or more gameObjects. VirtualHome being usable in version 2018.4.4f1, it is necessary to install the version 4.2.3 of ProBuilder.
Install ProBuilder
To install ProBuilder, we can follow this procedure:
Open the Package Manager (in Unity’s top menu: Window > Package Manager).
Enter ProBuilder in the search box.
Click ProBuilder in the package list (left side), then click the Install button in the package details (right side).
To verify that ProBuilder is correctly installed, open the ProBuilder toolbar (from Unity’s top menu: Tools > ProBuilder > ProBuilder Window).
If you don’t see the ProBuilder Window menu item, then ProBuilder did not install correctly.
Split a gameObject into several gameObjects
Drop the mesh into your scene
Open ProBuilder, select the mesh object in your scene, and click “ProBuilderize”
Use ProBuilder to select the faces you want to “break off” to a new mesh
Click “Detach Faces” (note: you can click the little “+” next to the button to choose whether the faces become a new GameObject, or SubElement in the same mesh!)
Example with a trashcan
For example, for the garbage object from the modern house interior package, we open ProBuilder, select the mesh of the object in the scene, then we click on ProBuilderize. After that, there is a Pro Builder Mesh script that is added as a component to the object.
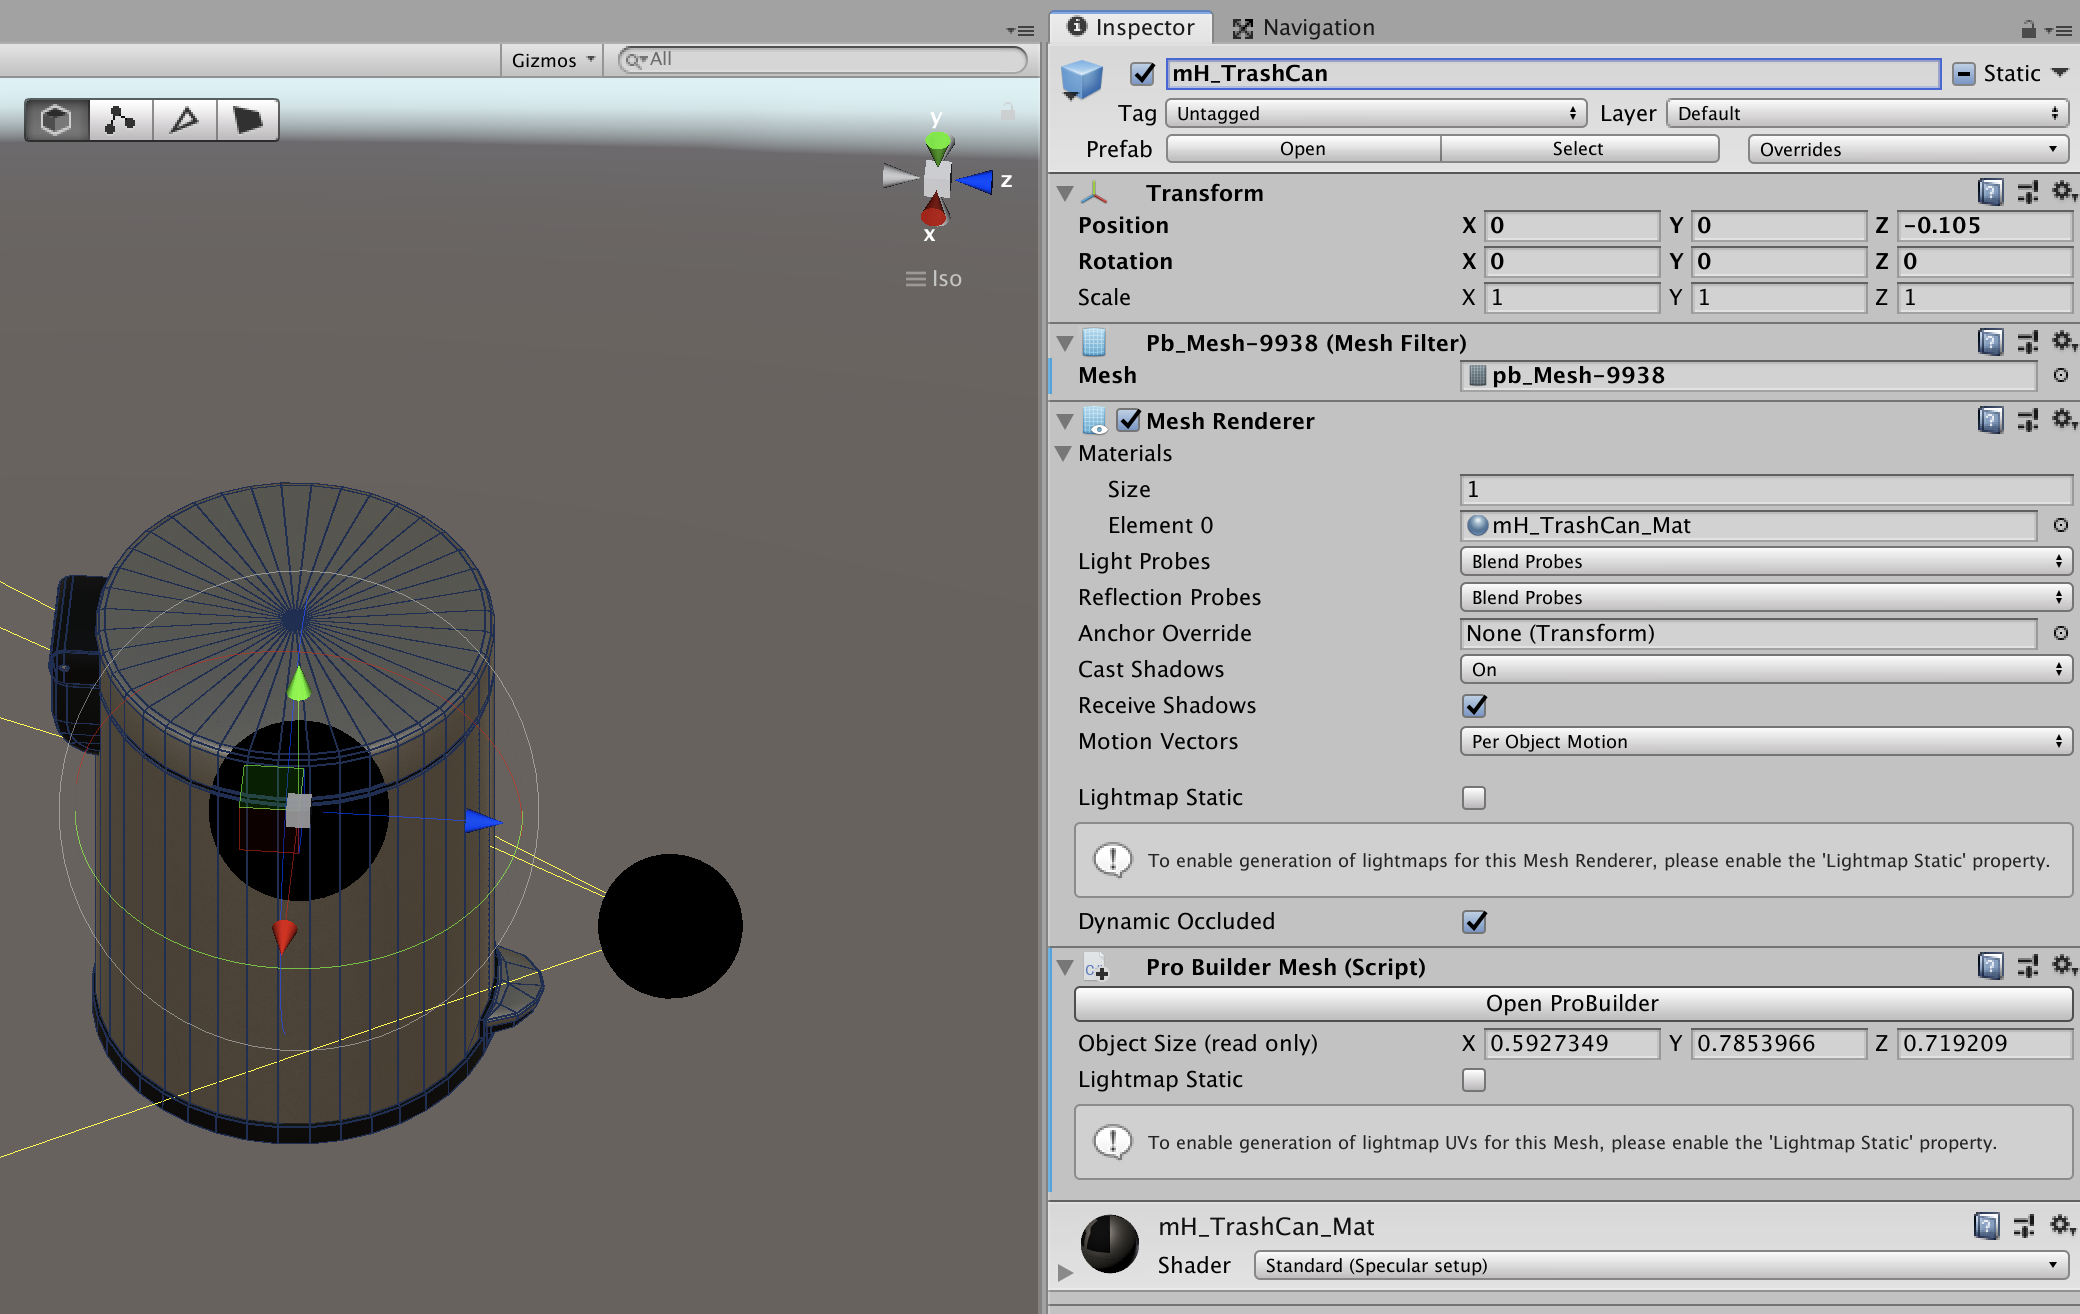
You have to tick the different faces, they become yellow. Once everything is selected, simply click on Open ProBuilder in the object inspector. In the menu that appears click on Detach Faces.
After use the command Detach faces, we obtain an other gameObject, we put it on children of the parent.
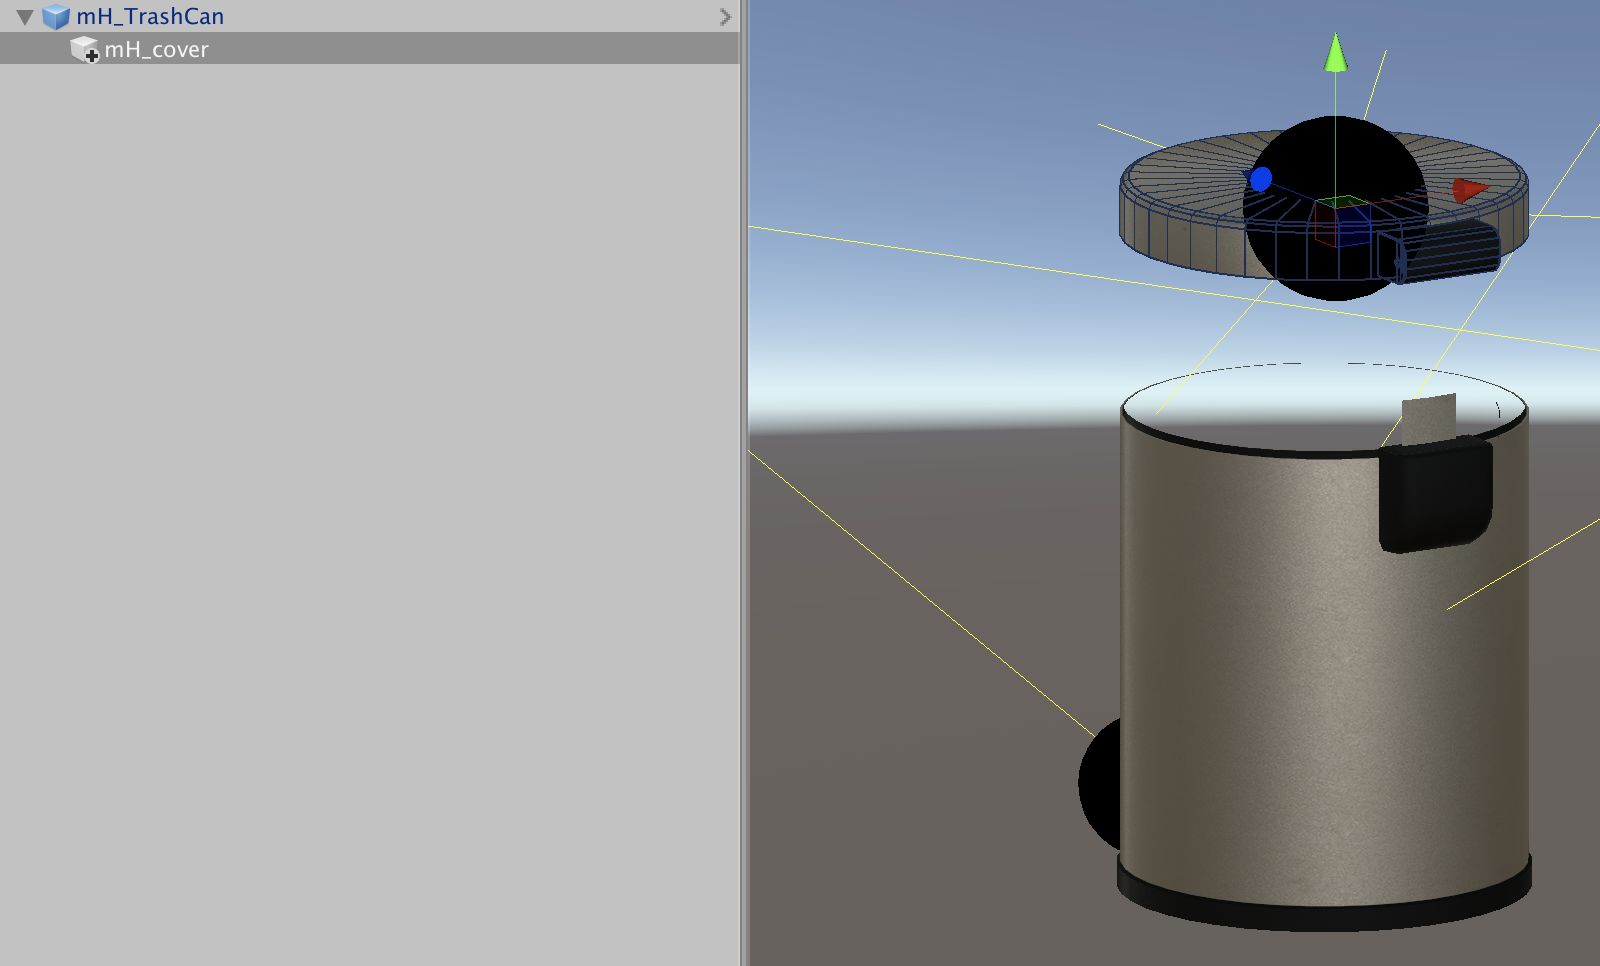
In order to open the cover, the pivot centre of the cover must not be in the centre. To do this, we use a gameObject empty which we move to the place of rotation then we place the object whose pivot we want to modify in child of this Empty. Thus, the empty becomes the pivot. In this example, the gameObject Cover_TrashCan is used as a pivot for the Cover object.
After that, we drag mH_TrashCan into Assets/Resources/Prefab. We rename the prefab and the cover, see below:

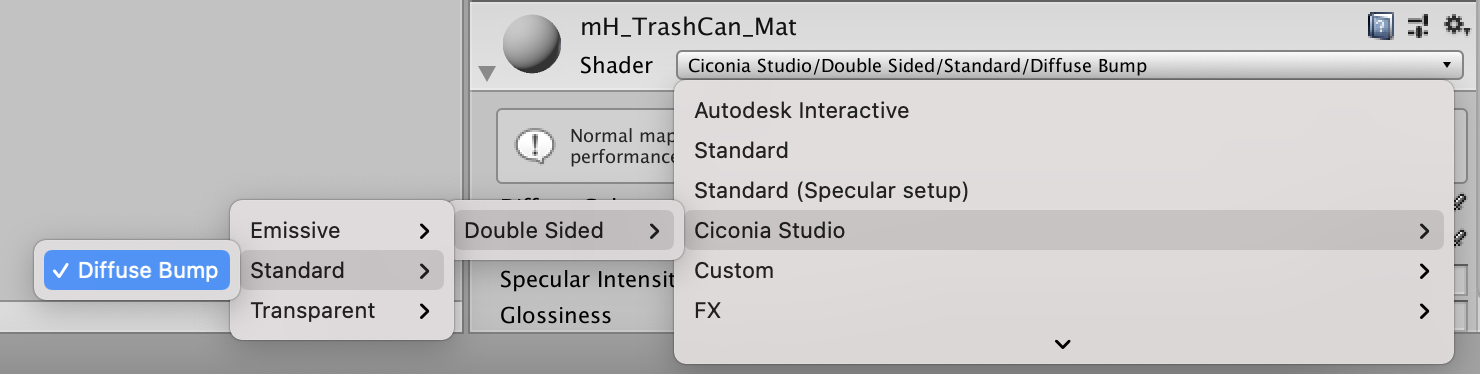
Double sided shaders
In order to have the inside of the bin visible and not transparent, the shader must be applicable on both sides of the object. For this, we use the free package : Free double sided shaders.
Then, we apply it to the desired object to be able to have the shader on the 2 faces of the object.
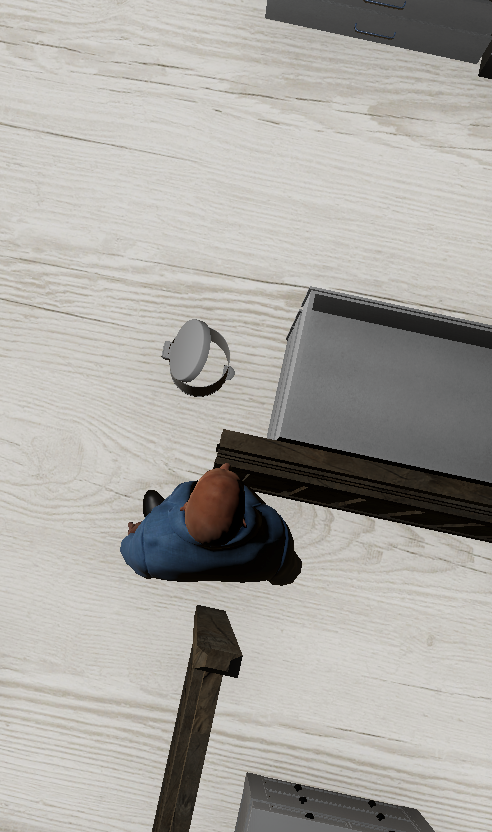
If we attach a script to the avatar with the action Open trashcan, the result will be :
Add the new GameObject to VirtualHome
Now, we need to add this prefab to virtual-home and annotate this object, so that it is interactive and usable in scripts via the python API.
To do this, we need to add the following 3 pieces of code to the corresponding files.
Update PrefabClass.json
{"className":"trashcan",
 "prefabs":
 [
   "TrashCan"
 ]
}
Update object_prefab.json
{
    "trashcan":[
      "Prefabs/TrashCan.prefab"
    ]
}
Update object_annotation.json
{
  "model_names": [
    "TrashCan"
  ],
  "annotation": {
    "container_doors" :[
      {
        "objName": "Cover_TrashCan",
        "hand_pose": "GrabVerticalSmall",
        "target_property": "Rotation",
        "sp": [-0.122, 0.2077664, 0.42],
        "delta": [-10,0,0]
      }
    ]
  }
}
sp is the position where you want the avatar to put his hand in order to be able to lift the lid of the bin.
delta is the desired rotation of the cover when the avatar interacts with the bin
We can now use this object in VirtualHome:
trashcan = find_nodes(graph_input, class_name='trashcan')[0]
script = ['<char0> [Open] <trashcan> ({})'.format(trashcan['id'])]

success, message = comm.render_script(script=script,
                                        processing_time_limit=100,
                                        find_solution=False,
                                        frame_rate=20,
                                        image_width=512, image_height=320,
                                        skip_animation=False,
                                        recording = True,
                                        image_synthesis=[],
                                        camera_mode=['PERSON_TOP'])
After running the above script, in the terminal, we can observe the changes of state of the bin from CLOSED to OPEN.
Before  execution of the script :
{'id': 35, 'category': 'Appliances', 'class_name': 'trashcan', 'custom_name': 'trashcan', 'sensor_equiped': ['openingClosing'], 'prefab_name': 'TrashCan', 'obj_transform': {'position': [9.61, 0.228, 5.21], 'rotation': [0.0, 0.0, 0.0, 1.0]}, 'bounding_box': {'center': [9.61, 0.3826264, 5.21227026], 'size': [0.23709397, 0.309252858, 0.287683576]}, 'properties': ['CAN_OPEN', 'CONTAINERS', 'MOVABLE'], 'states': ['CLOSED']}

Execution script :
['<char0> [Open] <trashcan> (35)']

After execution of the script :
{'id': 35, 'category': 'Appliances', 'class_name': 'trashcan', 'custom_name': 'trashcan', 'sensor_equiped': ['openingClosing'], 'prefab_name': 'TrashCan', 'obj_transform': {'position': [9.61, 0.228, 5.21], 'rotation': [0.0, 0.0, 0.0, 1.0]}, 'bounding_box': {'center': [9.61, 0.3826264, 5.21227026], 'size': [0.23709397, 0.309252858, 0.287683576]}, 'properties': ['CAN_OPEN', 'CONTAINERS', 'MOVABLE'], 'states': ['OPEN']}
How to create new animations
Written by Juliette Grassent
The animations in Virtual-Home were created using Adobe Mixamo (character animation library). Animations that are not implemented, and not playable after script generation, are animations not available in Adobe Mixamo assets. The implementation and addition of the Type action was possible because it was present in the VirtualHome assets. We will therefore take this example for the documentation.
Animator
In the animator there are 2 Layers: Base Layer and UpperBody. In the UpperBody layer: add the Typing state (see central part of the figure below)
Create the boolean parameter corresponding to the action of the animation (here Type)
In the inspector: add the corresponding Mixamo animation
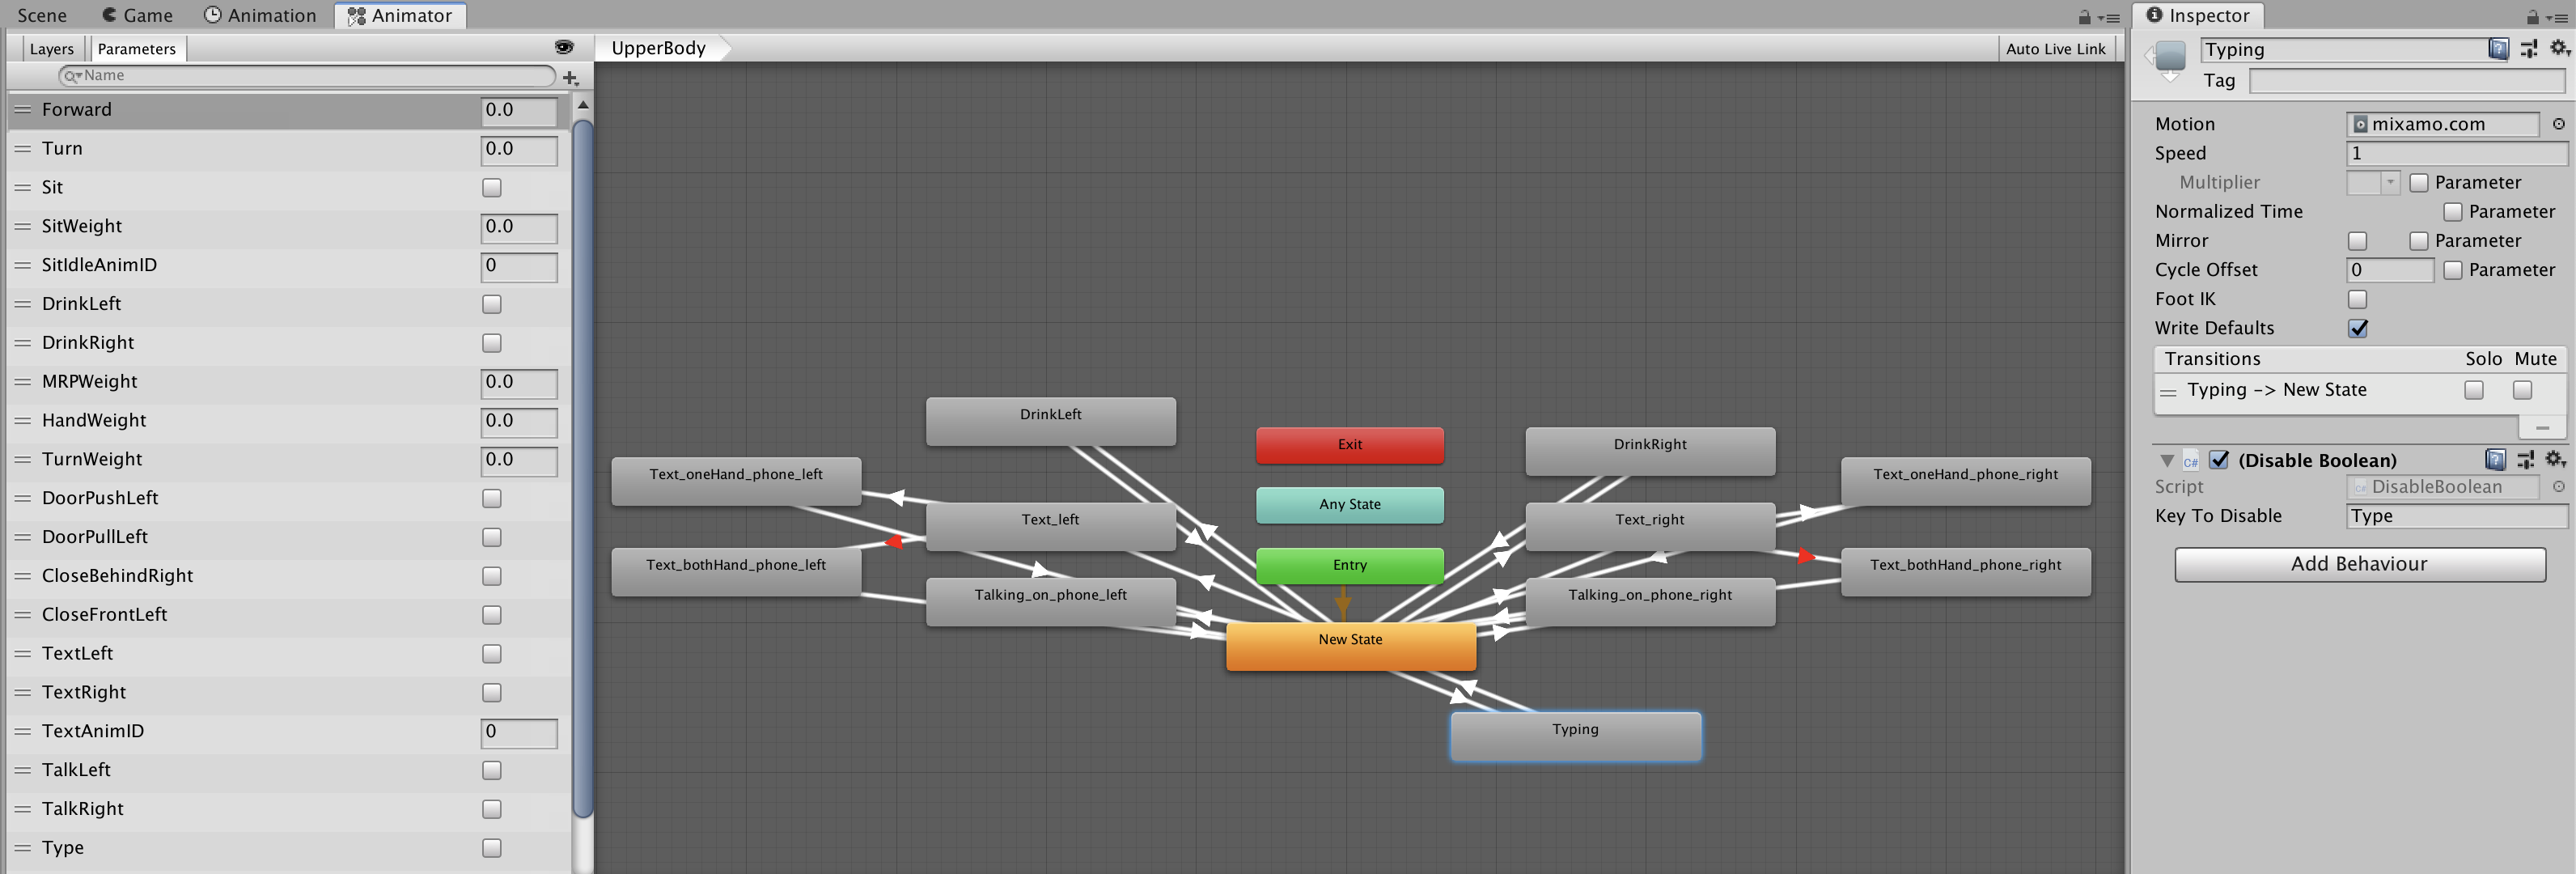
Add round trip transitions with New State.
Add the necessary conditions in the Inspector to enter or exit this new state (here Typing)
Managing the transition using the timeline
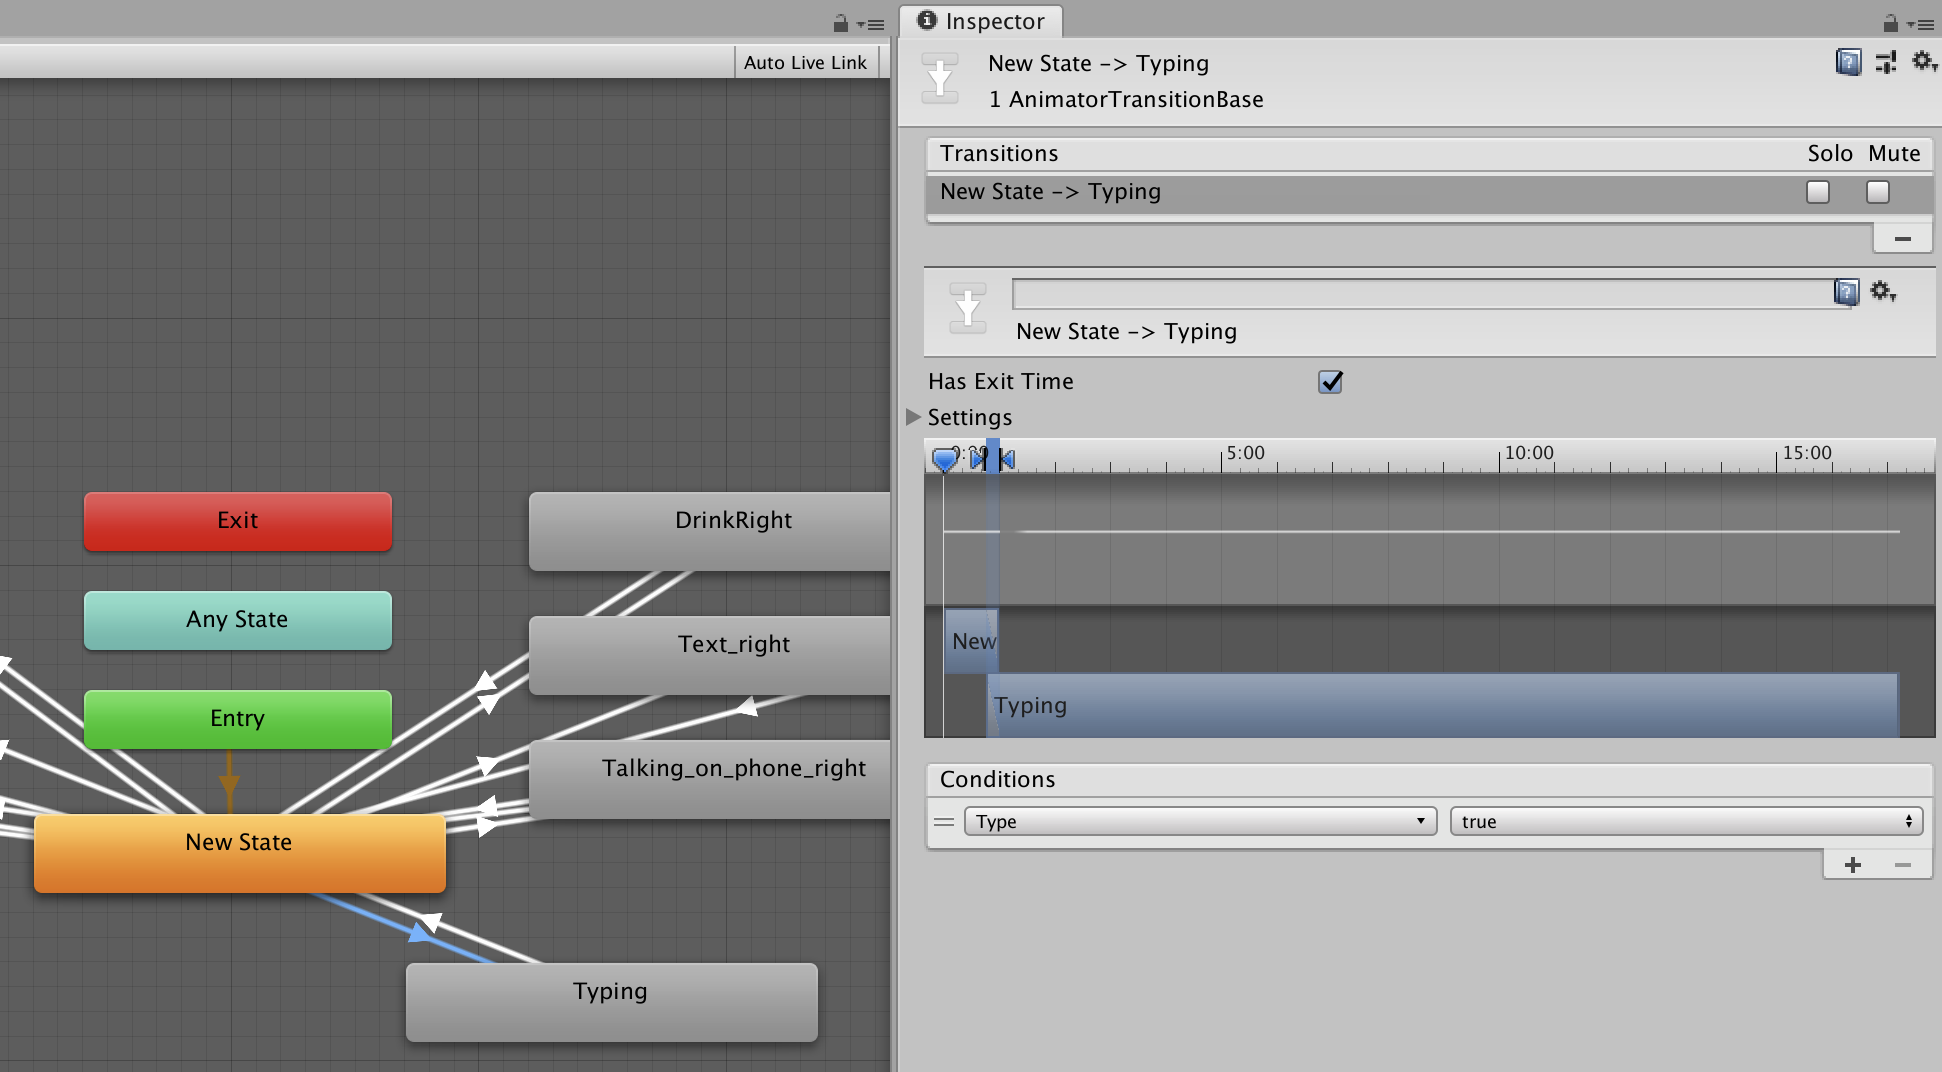
It is possible to see the transition played in the Preview window, if the avatar “falls”, this is due to a wrong setting of the imported animation. To fix this problem :
Click on the Mixamo animation present in the “Assets” (.fbx file).
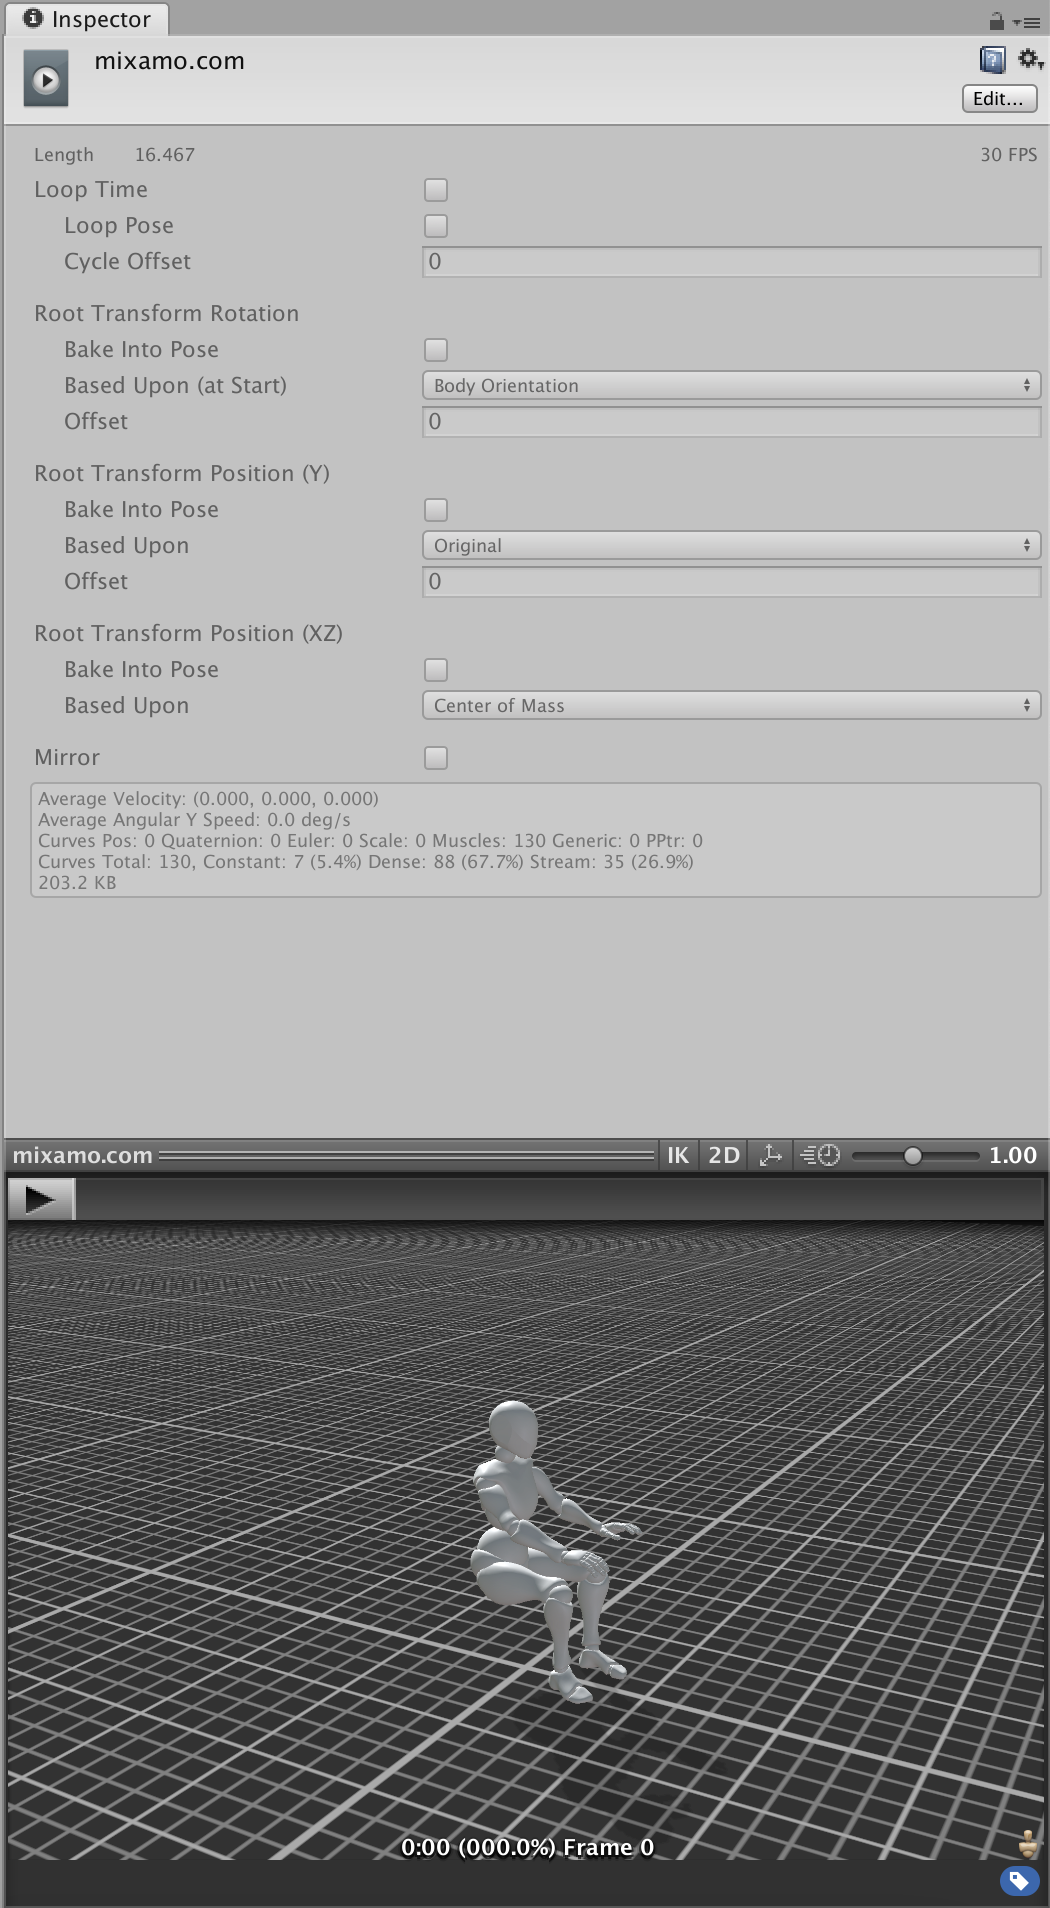
Click on “Edit” in the Inspector (see figure above).
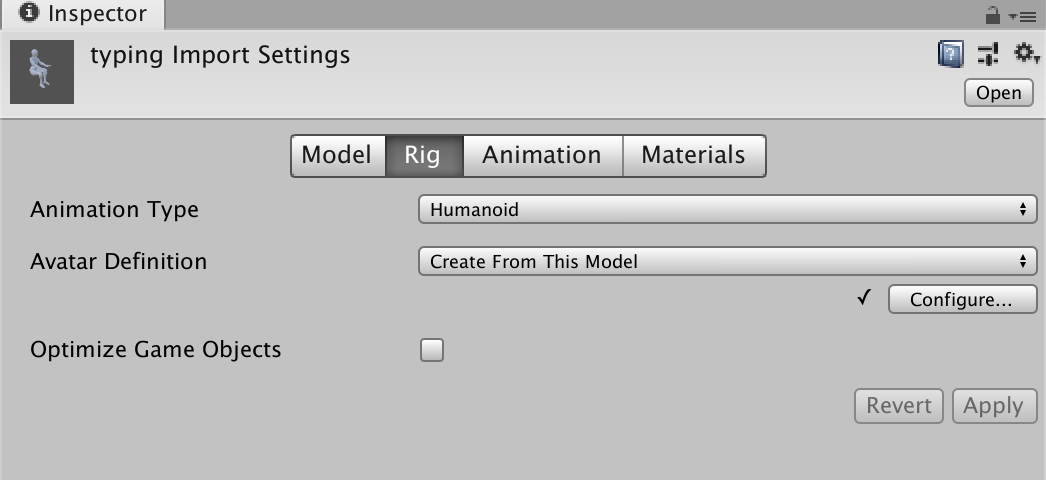
Click on “Rig”, change animation type to Humanoid and Avatar Definition to Create from This Model.
Implementation of the action linked to this animation
In the file CharacterControl.cs (Assets/Story Generator/Scripts) :
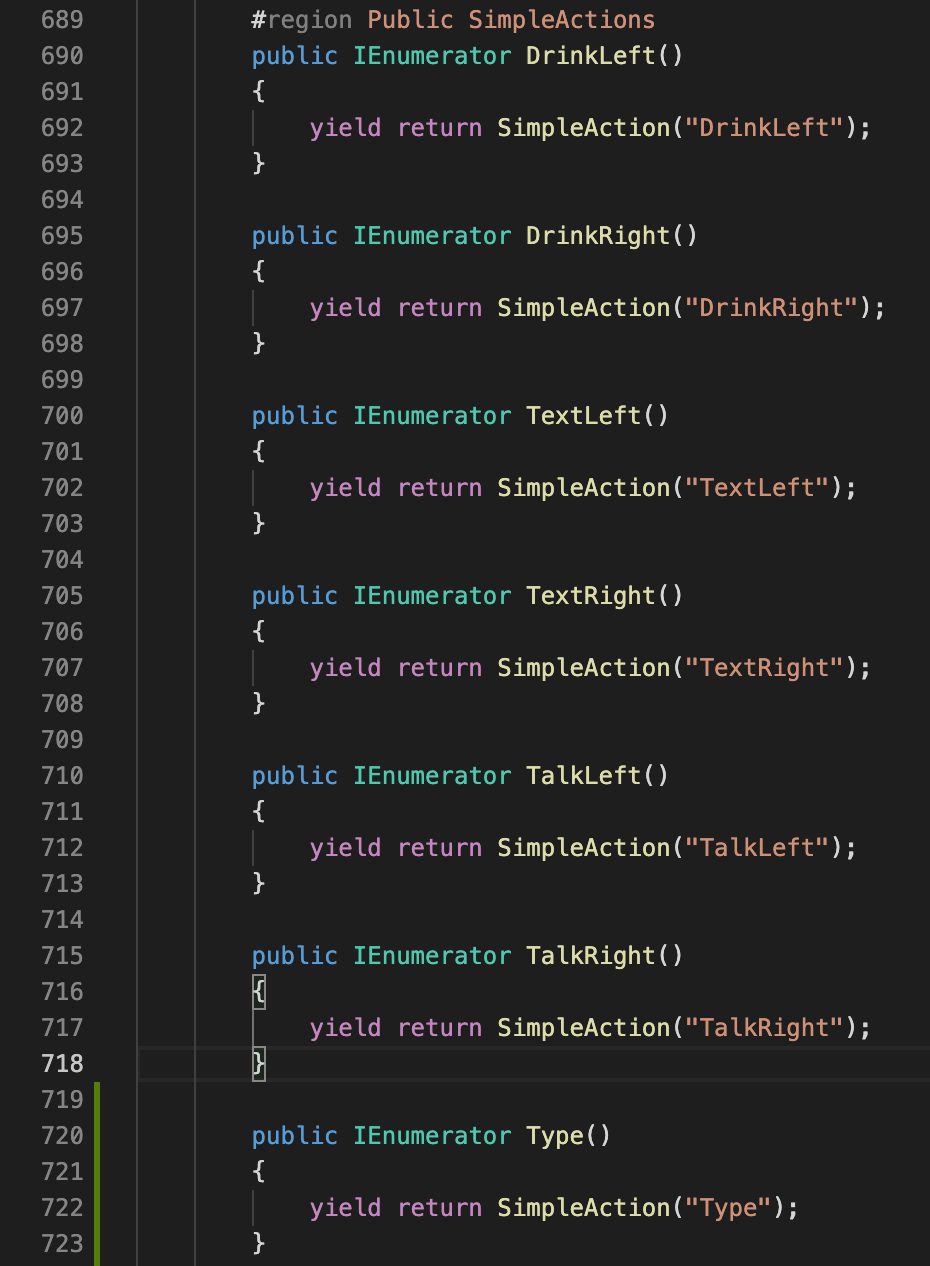
For a simple action for the upper body as Type, just create an IEnumerator as below in the Public SimpleActions region:
public IEnumerator Type()
{
    yield return SimpleAction("Type");
}
Test its animation without script
To test its animation without script :
In the scene Drink&Phone (Assets/Story Generator/DemoScenes/), go to the file SimpleAction.cs (Assets/Story Generator/DemoScenes/) and add the following lines to have the test button at the execution of the action in the scene SimpleAction :
if ( GUILayout.Button("Type") )
{
    StartCoroutine( cc.Type() );
}
After the launch of the SimpleAction stage:
Press the Type button so that the animation Typing is triggered (change from the Type boolean in the animator to True).
With a script:
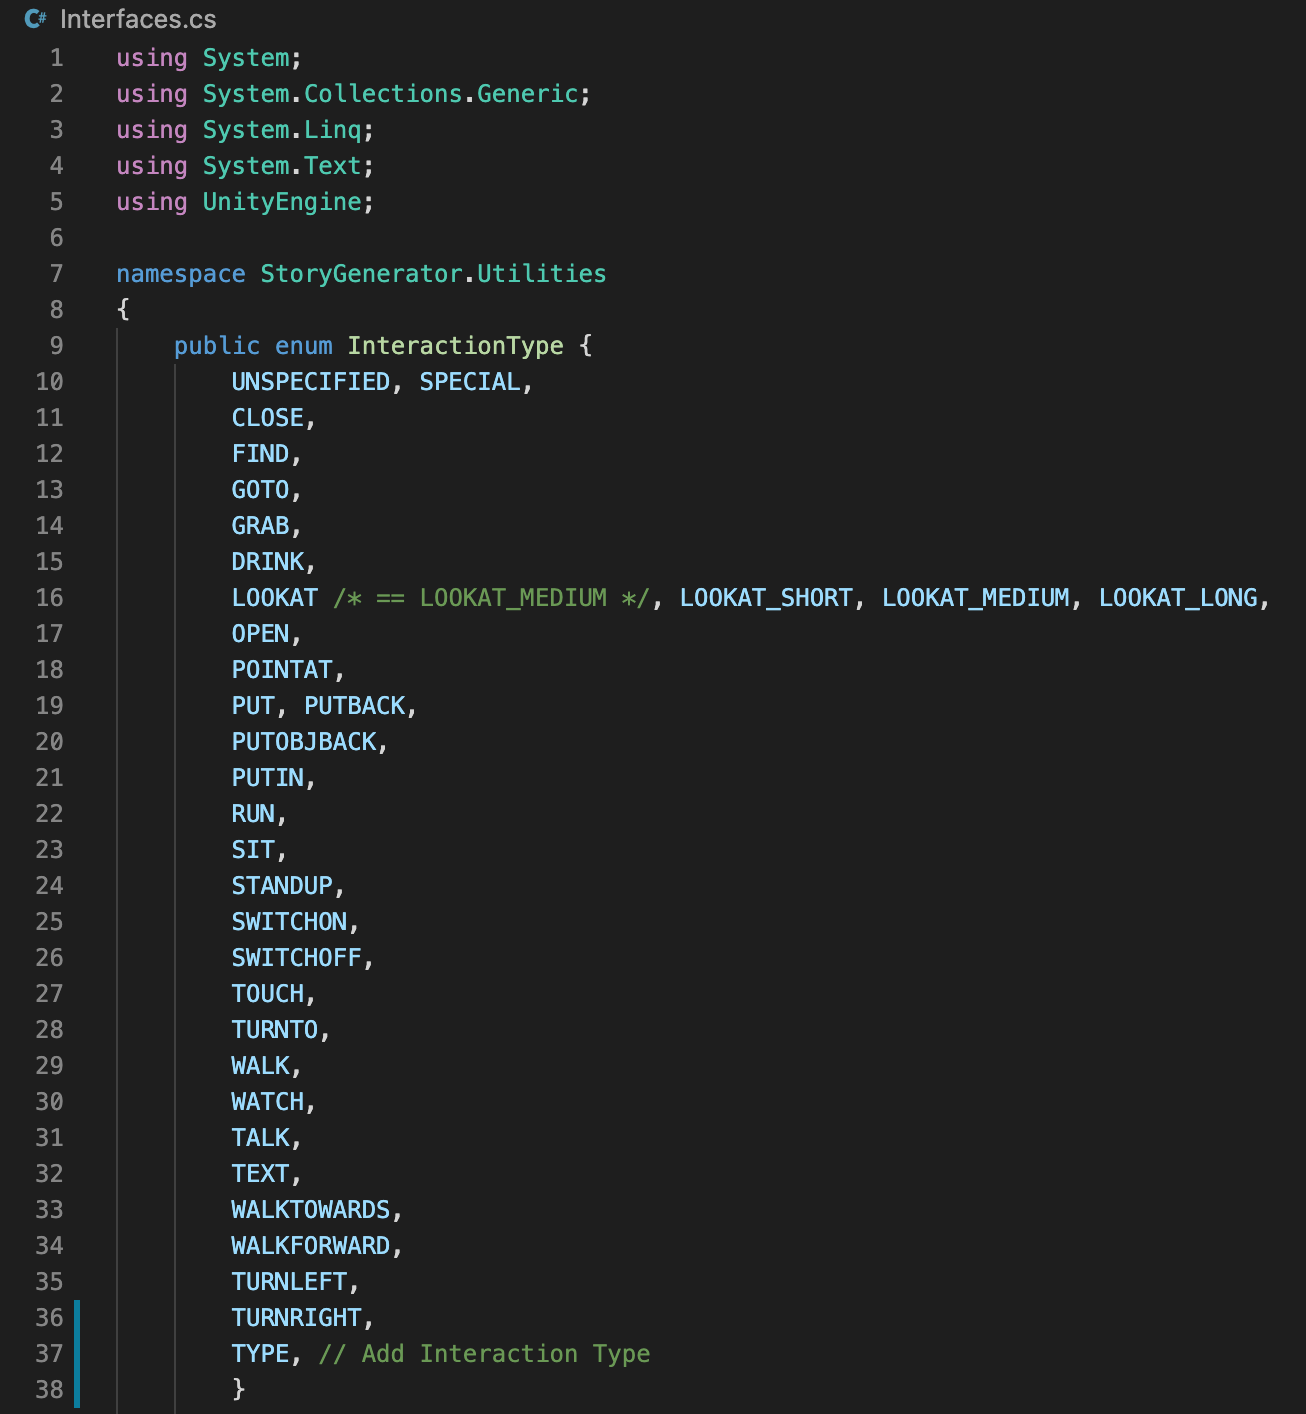
In the Interfaces.cs file (Assets/Story Generator/Sripts/): Add the name of the action in the InteractionType enum (see figure below) :
In the CharacterControl.cs file (Assets/Story Generator/Scripts/), in the SimpleActions region (here Typing is a simple action), add the IEnumerator Type which will allow to change the Type boolean to True when this function is called:
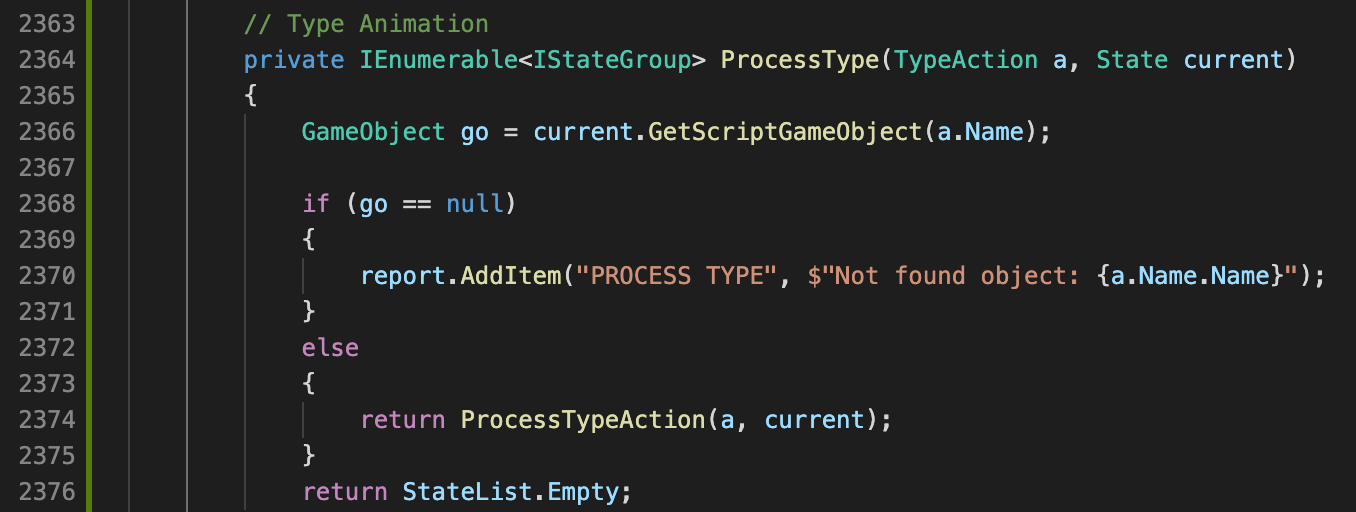
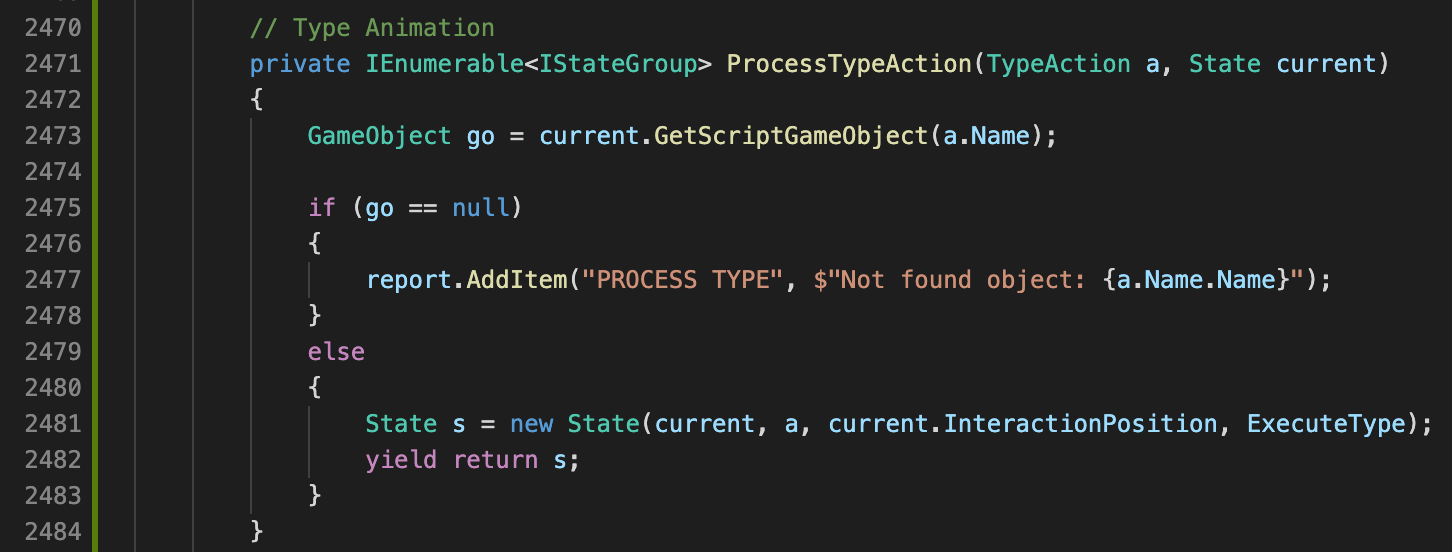
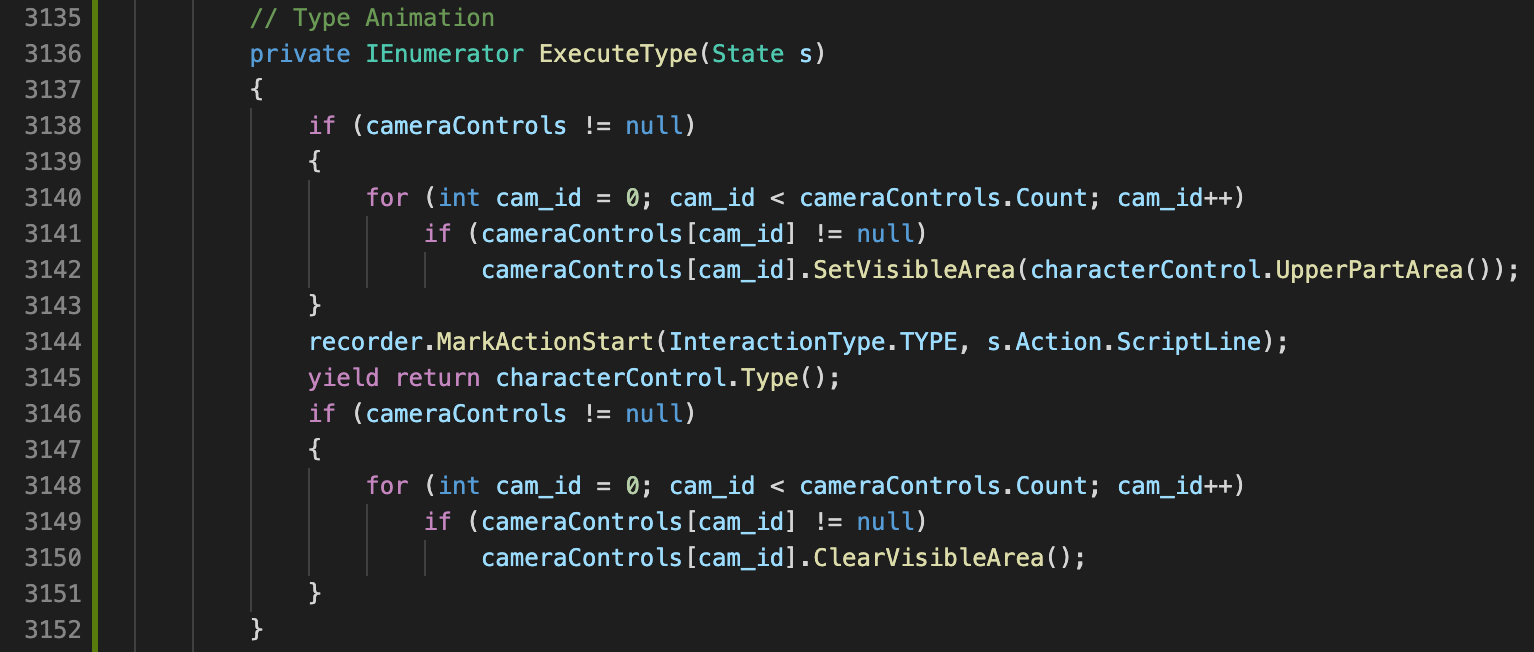
In the ScriptExecution.cs (Assets/Story Generator/Scripts/) file, the following functions must be created for the possible execution of the Type action:


Finally, we must add the possibility of having this action. To do this, you have to modify the function private static void ScriptLineToAction(ScriptExecutor sExecutor, int index, IList<ScriptLine> sLines) by adding the lines below inside the switch in the function.
